These days, digital technology is getting better, and connecting your electric guitar to a computer is simple which can do a lot in various things. Many guitar lovers wish they could mix the raw power of their electric guitar with magical edit of digital sound. People thought this process is hard to understand because there are a lot of complicated words and lines.
This ‘How to connect electric guitar to computer?’ article is your roadmap. Eguitarmania navigates through the process of connecting an electric guitar to a computer. Transforming what might appear as a technical challenge into an exciting journey of musical exploration. So grab your guitar and optimize your setup for the best sound quality.
Equipment Needed For Connecting An Electric Guitar To A PC
Let’s outline the equipment needed for connecting an electric guitar to a PC.
Audio Interface
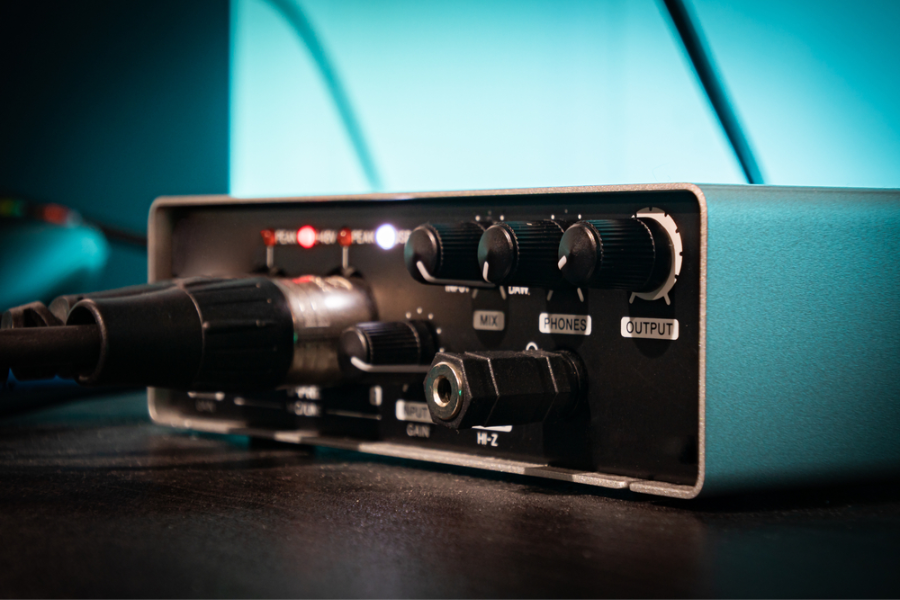
This is the heart of your connection setup. An audio interface converts the analog signal from your guitar into a digital format that your PC can process.
Look for interfaces with a high-quality preamp and low latency. Popular choices include models from Focusrite, Behringer, and Presonus.
Facts and information:
- Quality: Look for interfaces with high-resolution AD/DA converters. A bit depth of 24-bit and a sample rate of at least 44.1 kHz are standard.
- Input/Output: Microphone or line-level input, enabling 48V phantom power. USB-C or Apple Lightning connector, FireWire, Thunderbolt.
- Latency: Low latency is crucial for real-time monitoring. Many modern interfaces offer near-zero latency monitoring features.
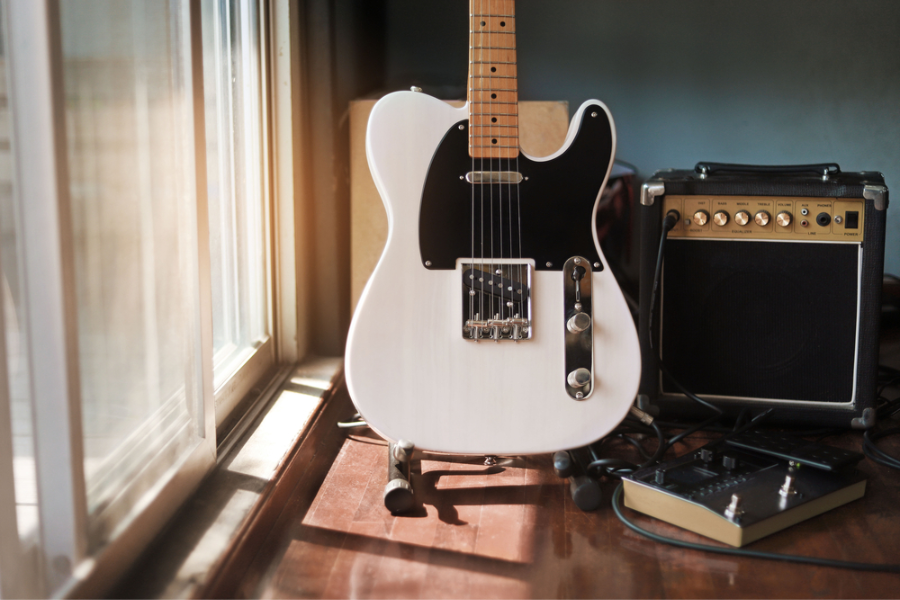
Guitar Cable
While it may seem like a small detail, the quality of your guitar cable can greatly influence your sound. You will need a standard ¼ inch guitar cable to connect your electric guitar to the audio interface. Ensure the cable is of good quality to avoid any signal interference or loss.
Facts and information:
- 3.5mm Jack: most commonly use, standard 3.5mm jack to jack cable will find most use as an AUX cable.
- 1/4″ TRS – These are usually shielded, mono cables. Keyboards, synths, and the balanced outputs of external audio mixers are familiar examples of line-level sources.
- XLR – commonly used for connecting microphones. They are a balanced connector with three pins on the male connector.
- RCA Cables: use for HiFi or home audio usage. Connect speakers to devices such as stereo systems or audio interfaces.
Multi-Effects Pedal
Multi effects pedals can often be programmed to work alongside your DAW.
Multi-Effects Pedals are loved for their ability to combine numerous effects like reverb, distortion, chorus, and delay into a single, compact unit. These tools offer additional functions (like a tuner) and don’t just offer your standard array of effects. Some even offer unique functions like chord books or scale snap books.
Facts and information:
- Value For Money: Multi effects starting price from 100-200USD for over 100 effects. This in itself makes multi effects very attractive to the budget musician.
- Integration: Many modern pedals are designed to integrate seamlessly with computer-based setups, offering USB connectivity and even software control.
Guitar Amp
To connect your guitar amp,using a1/4-inch jack cable onto the “line out” output. Your PC should have audio recording and editing software, commonly known as a Digital Audio Workstation (DAW). Options range from beginner-friendly software like GarageBand (for Mac) to professional-grade ones like Pro Tools, Ableton Live, or FL Studio.
I found out on App Store an app called TONE BRIDGE, here you can find patches for all your favourite classics, the best part is it completely free!
Facts and Information:
Virtual Rig: This tool suite filled with sought-after guitar and bass amp simulators, studio effects, and pedals. Esay way to try different possibilities for jamming, producing, and getting lost in experimentation.
Direct Input Options: Some amps offer a direct output that can be connected to an audio interface, providing a blend of direct and amplified tones.
Amp Simulators: Many DAWs offer amp simulation plugins, which can mimic the sound of an amp without needing the physical hardware.
How To Connect Electric Guitar To Computer
You have two options for connecting the guitar to the interface.
Plug the guitar directly into the interface via instrument cable
Detailed Steps
- Connect Your Guitar: Using a standard ¼ inch instrument cable, connect your electric guitar to the input jack of your audio interface. Ensure the connection is secure to prevent any signal loss.
- Interface Setup: Power on your interface and connect it to your computer via USB, Thunderbolt, or FireWire, depending on the model. Modern interfaces are typically plug-and-play, requiring minimal setup.
- Input Level Adjustment: On the interface, adjust the input level (gain) for your guitar. Start with a lower setting to avoid clipping, gradually increasing until you achieve a strong, clear signal.
This method is simple and straight, which makes it perfect for getting a clean guitar tone. It works especially well for styles that depend on digital effects or exact sound shape. But it might not have the subtleties that an amp does, which makes it less good for styles that depend a lot on amp tone.
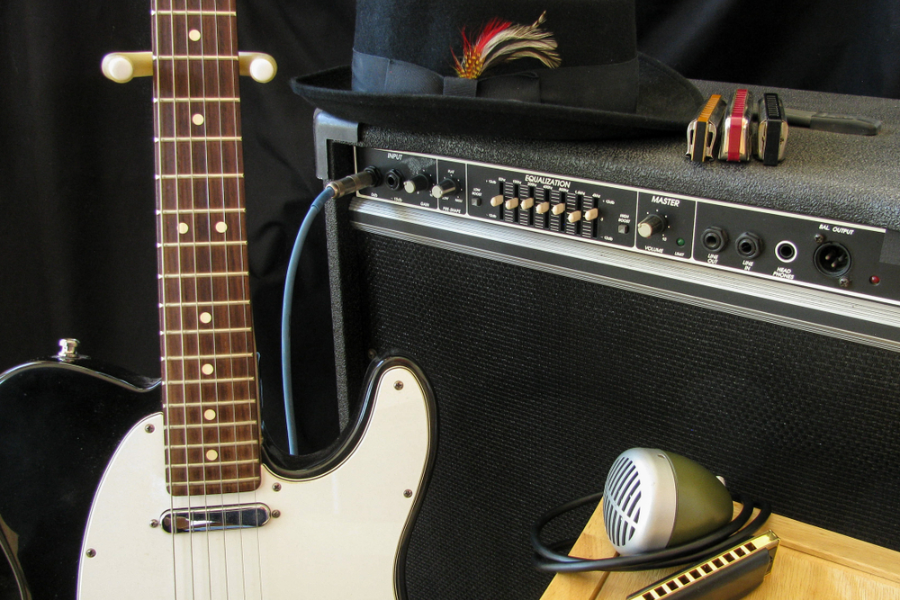
Mic the guitar amp and plug the mic into the interface
Depends on the tone you want. Micing the amp will give you a more authentic tone that’s truer to the character. Here are step-by-step guide:
Setting Up the Amp: This is a crucial step because the sound you dial in now is what will in the record. Begin by setting your guitar amp to the desired tone.
Microphone Placement: Position a microphone in front of the amp. Remember to get closer to the center for brighter tone. If you’re not sure which mic to use, a dynamic microphone is usually a solid choice for this.
Connecting the Mic to the Interface: Connect your microphone to the audio interface using an XLR cable.
Level Adjustment: Similar to the direct connection method, adjust the mic input level on your audio interface, being mindful to avoid clipping.
This method is especially beneficial for styles where the amp’s character is pivotal, such as blues or rock. It’s also a preferred method in live performance scenarios or when seeking a more organic, natural guitar sound.
How to Control Your Effects and Tones by Plugins
Guitar Rig 6 by Native Instruments
Features and Capabilities
When it comes to amps, cabinets, and effects, Guitar Rig 6 stands out thanks to its easy-to-use design and large libraries. Users can set up complex microphones in the control room, which gives them studio-quality sound. It now has more sound options thanks to the addition of new amps and effects and improved cabinet models.
User Experience
Users often praise Guitar Rig 6 for its straightforward layout, making it accessible for beginners while still offering depth for professional use. One issue we had with past editions of Guitar Rig was how difficult it could be to manage parameters across large racks with many components. The drag-and-drop functionality in the signal chain is a highlight, allowing for easy experimentation with effects and amp combinations.

AmpliTube 4 by IK Multimedia
Range of Amps and Effects
AmpliTube 4 is a powerhouse with over 140 ultra-realistic amps and effects. Its Cab Room feature is a standout, offering a 3D speaker cabinet mixing environment, which adds a new level of realism and customization.
Usability and Realism
AmpliTube is renowned for its user-friendly interface and authentic-sounding gear models. Its ability to mix and match amps, speakers, and microphones offers users a virtually endless palette to craft their tones.
BIAS FX by Positive Grid
Customization and Tone Shaping
BIAS FX excels in customization. With its Amp Match technology, users can replicate any real-world amplifier. Additionally, its dual signal path allows combining two sets of amps and effects simultaneously, offering a wide range of tonal possibilities.
Integration with Hardware
A unique aspect of BIAS FX is its integration capabilities with guitar hardware, particularly with Positive Grid’s own BIAS Amp and BIAS Pedal products, allowing for a cohesive hardware-software setup.
Helix Native by Line 6
Software Interface and Flexibility
Helix Native is completely functional without hardware, though you’ll need a DAW or plug-in host of some kind, as there’s no standalone mode.
Its interface mirrors the physical unit, providing a seamless transition for Helix hardware users. The plugin offers a vast array of amp, cab, and effect models, all with deep editing capabilities.
Sound Quality
Professionals often note the realistic sound quality of Helix Native. Its HX modeling technology is praised for replicating the dynamic response of traditional amplifiers and effects accurately.
Comparison table of 4 plugins
Based on the information I found, here’s a concise comparison of the four guitar plugins:
| Feature/Plugin | Guitar Rig 6 (Native Instruments) | Helix Native (Line 6) | AmpliTube 4 (IK Multimedia) | BIAS FX (Positive Grid) |
| Core Function | Multi-effects rack and amp simulator | Amp and effects modeling software | Guitar amp and FX modeling | Amp and effects modeling |
| Sound Quality | Studio-quality sound with new cabinet modeling | Realistic sound with HX modeling technology | Authentic gear models, realistic sound | High-quality sound with customization |
| Key Features | Revamped GUI, machine learning | Extensive range of amp, cab, deep editing | Over 140 ultra-realistic amps and effects, 3D cab room | Amp Match technology, dual signal path |
Each of these plugins has its unique strengths, catering to different preferences and requirements.
Getting Great Tones on Your Computer
I always start with a test recording to get my levels right and make sure the sound quality is good. I need to use a metronome or click track all the time, especially when I’m working on records with more than one track. This helps me keep everything in sync.
When I edit, I focus on cutting, breaking, and putting my tracks in the best order for organization. One important part of my process is trying out different effects and plugins to see how they change the sound. I pay close attention to level balance, shifting, and EQ when I mix to make a mix that sounds good together.
Some more personal tips: When I mic an amp, I move the mic around to find the best sound. For a fuller sound, I also use the method of layering tracks. And when I’m recording or mixing, I always use good headphones or studio speakers to make precise changes to the sound. To keep getting better in the studio, I tell myself to be patient and keep learning.
Final Thought
Connecting an electric guitar to a computer may seem complicated, but Eguitarmania makes it easy. They simplify the setup for digital music producers by giving step-by-step instructions and suggesting reputable equipment. Anyone can connect their electric guitar to a computer and explore digital music making with the correct coaching and equipment.