Different bridges require different approaches, adjusting the bridge on your electric guitar might sound tricky. This adjustment helps players get the best sound quality and performance. It requires some basic tools and understanding of the parts involved. Who else wants to learn how to adjust electric guitar bridge?
This article is all about making your electric guitar just right for you. Eguitarmania will look at the three most popular bridges used on electric guitars and look at how to adjust them. You’ll learn how to fix common problems like strings that are too high or too low, or if they’re not playing the right notes.
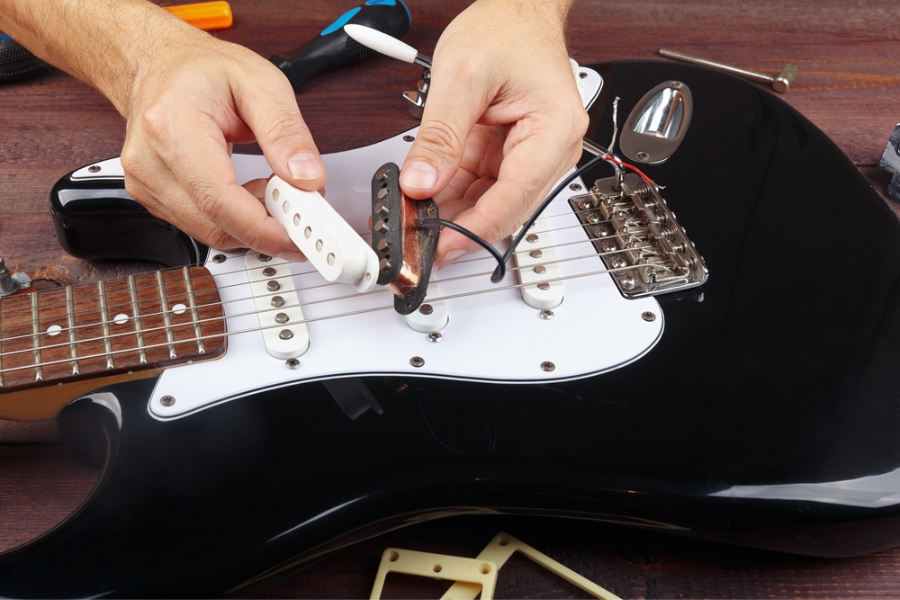
Basics of Electric Guitar Bridge
Adjusting a vibrato bridge on an electric guitar is a key skill for maintaining the instrument’s playability and sound quality.
Intonation Adjustment for the Bridge
After making some adjustments to the intonation, the notes played across the fretboard are now clearer and more precise.
Steps for Intonation Adjustment
Tune Each String Carefully
Begin by tuning each string to its standard tuning using a reliable tuner. A chromatic tuner is especially useful here, as it can accurately detect the pitch of each note. It’s important to ensure the guitar is in tune before making any adjustments.
Check the 12th Fret Harmonic
Play the harmonic at the 12th fret for each string, then play the fretted note at the 12th fret. In my experience, this step often reveals which strings are out of intonation. These should sound the same. If they don’t, intonation adjustment is necessary.
Adjust the Bridge Saddles
If the fretted note is sharp compared to the harmonic, the string length needs to be increased. Move the bridge saddle back using a screwdriver. If the fretted note is flat, shorten the string length by moving the saddle forward.
It only required a small screwdriver and a bit of patience, as moving the saddle too much could overshoot the correct adjustment.
Retune and Recheck
After adjusting, we should retune the string and recheck the intonation. Repeat the process until the harmonic and fretted notes match perfectly. I’ve found that making small adjustments and rechecking frequently prevents overcorrection and ensures a more accurate tuning across the fretboard.
String Height Adjustment for the Bridge
String height, or action, significantly affects a guitar’s playability and comfort. The distance of the strings from the fretboard affects the guitar’s tone, with lower action often resulting in a sharper, more defined sound.

Steps for String Height Adjustment:
Measuring the Current Action
Before making adjustments, measure the current string height at the 12th fret using a ruler or a specialized string action gauge. For a comfortable playing experience, I aim for about 1.5mm to 2mm of height.
Adjusting Each String Individually
Most electric guitars have individual saddles for each string, allowing for precise height adjustment. Using a small screwdriver or hex key, turn the adjustment screw to raise or lower each saddle. I was amazed at how a few small tweaks could make such a noticeable difference in playability.
The Balancing Act: Playability vs. Tone
Finding the right action is a personal choice and can depend on your playing style. Adjusting the string height can slightly alter the tension on the neck, which may affect tuning. It’s crucial to adjust and retest until you find the optimal setup for your playing style.
Setting up a Electric Guitar Bridge
Fixed Bridges
Fixed bridges are found on approximately 70% of electric guitars, indicating their popularity for their stability and ease of maintenance.
Set up: On fixed bridges, the string height can be changed by moving individual saddles or, in some cases, two screws that raise or lower the bridge. By moving the saddles forward or backward, you can change the intonation.
Ideal string height at the 12th fret ranges from 1/16" (1.6mm) for the high E string to 3/32" (2.4mm) for the low E string, though player preference can vary.

Tremolo Bridges
Tremolo bridges, including both vintage-style and modern variations, are featured on around 25% of electric guitars. This statistic underscores the demand for vibrato effects in music.
Setup: The tension of the strings and the springs in the guitar’s back must be balanced during setup for the tremolo bridge to keep the tuning stable. Shifting the saddles allows for fine-tuning of intonation.
The ideal balance point for a floating tremolo bridge allows for both upward and downward pitch modulation, typically allowing a pitch raise of a fourth on the G string and a pitch drop of a fifth on the E string.
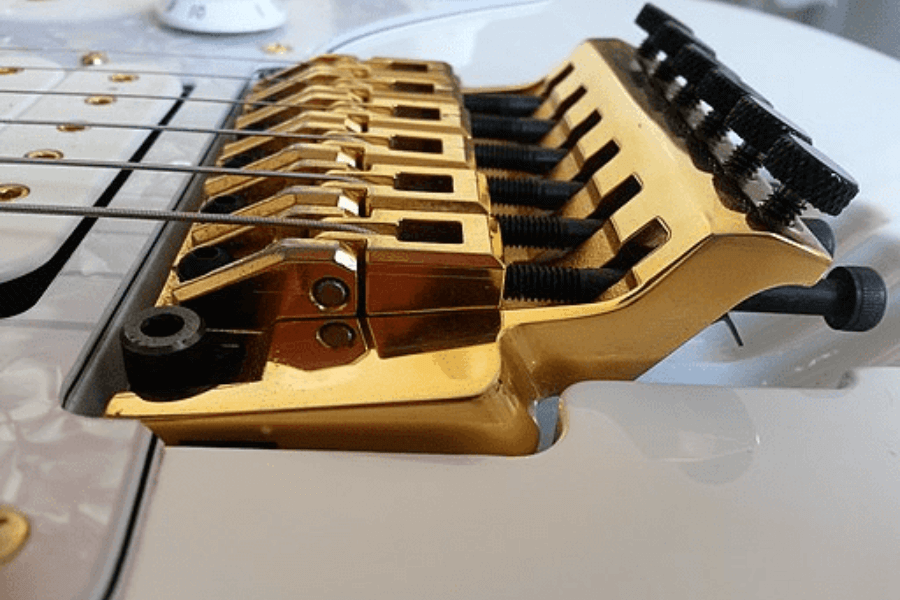
Locking Tremolo Systems (e.g., Floyd Rose)
About 5% of electric guitars have locking tremolo systems, which are popular with players who want extreme vibrato effects without losing their tune stability.
Setup: To set up the guitar, the strings are locked at the nut and bridge, the spring tension is balanced, and the bridge tuning is adjusted. Once the strings are locked in place, the fine tuners on the bridge make it possible to make precise tuning changes.
At the 12th fret, the action often changes from 1.5 mm for the high E string to 2 mm for the low E string.
Types of Bridges of Electric Guitar
The bridge on an electric guitar is one of the most identifiable parts of an instrument. Bridges for electric guitars can be divided into two main groups, “vibrato” and “non-vibrato”.
Vibrato bridges have an arm (called the vibrato or whammy bar that extends from below the string anchoring point. It acts as a lever that the player can push or pull to change the tension of the strings and, as a result, the pitch.
Non-vibrato bridges supply an anchoring point for the strings but provide no active control over string tension or pitch.
Tremolo Bridges
A synchronised tremolo is a tremolo system that ‘moves’ the bridge and the tailpiece. Among these, tremolo bridges stand out for their unique ability to create expressive vibrato effects. Let’s explore the world of tremolo bridges.
Synchronized Tremolo
A synchronized tremolo is a hallmark of the Fender Stratocaster, introduced by Leo Fender in 1954. This system allows smooth pitch modulation while maintaining excellent tuning stability, which has made it extremely popular among guitarists.
The bridge is attached to the guitar’s body with screws, allowing it to pivot and create the tremolo effect. The string tension is counterbalanced by a spring system in the guitar’s rear cavity, forming a full floating bridge
Floyd Rose Bridges
The 1980s saw the rise of locking tremolo systems, with Floyd Rose leading the innovation. These systems offer enhanced tuning stability, ideal for aggressive tremolo techniques like dive bombs.
The Floyd Rose locking tremolo ‘locks’ each string at both the bridge and the nut, greatly reducing tuning instability even under dynamic playing. This made it the go-to choice for ’80s and ’90s guitarists known for their expressive tremolo use
Floating Tremolo Bridge
The floating tremolo first appeared on the Fender Jazzmaster. Unlike the synchronized tremolo, the floating tremolo allows for bending pitch both up and down. This system features a tailpiece that’s set against the body, with the strings threaded through a lip rising in a small wave over the tailpiece. This unique design of floating tremolos provides a wide vibrato range, as the bridge literally “floats” above the guitar body.
Non-vibrato bridges
Fixed bridges are screwed into the body of the guitar to keep the strings in place and rest on saddles. Your fixed bridge won’t need any further adjustments once it is well set-up, intonated, and action adjusted. They are reliable, easy to maintain, and a breeze when it comes to changing strings.
Telecaster Bridges
The 1951 Fender Telecaster bridge is a classic fixed bridge. Telecaster bridges are simple and reliable, contributing to the guitar’s bright and powerful tone. A steel plate with three or six saddles is usual. The design is stable and simple to use, although it lacks vibrato and pitch bending.
Wrap-around Guitar Bridge
One of the simplest and most trustworthy electric guitar bridges is the wrap-around. Strings wrap across this single-piece bridge. With its minimal setup adjustment possibilities, this string anchoring mechanism is simple and sturdy.
Wrap-around bridges have no break angle, so adjusting one string affects the others. However, certain aftermarket wraparound bridges allow string changes.

Tune-O-Matic Bridges
Since Gibson debuted the Tune-O-Matic bridge in the early 1950s, it has established an industry standard for accuracy and simplicity of operation. It provides precise string intonation and action modifications, making it a player favourite. Each string has its own saddle, and the bridge allows independent intonation adjustment.
Tune-O-Matic bridges operate best with 12-inch-radius guitar fretboards. It’s recognised for its sustain and fine intonation, although action adjustment may be difficult.
Final Thought
Learning about the details of your guitar’s bridge type and making changes step by step can make a big difference in tone, sustain, and playability. When adjusting a guitar, whether it has a fixed bridge, a tremolo system, or a locked tremolo setup, it’s important to pay close attention to the little things and be ready to try new things.