“Do I need expensive equipment?”, or “How do I even start?” These concerns are on the minds of many musicians and enthusiasts when they want to record electric guitar on a PC. Recording guitar on a PC has always been challenging. Most players want to record and edit their playing for the first time. Another reason is that there is a lot of great software for modeling amplifiers and effects, which can be very useful for musicians.
In this guide, Eguitarmania will speak from our experience and make your journey simple enough that anyone can learn. It’s now very easy to record at home thanks to technology, and there are many ways to record your guitar on a PC. We’ll cover practical tips and step-by-step guides on how to record electric guitar on PC with clarity and depth.
What Do We Need To Record Guitar On PC?
Recording your guitar on a PC can turn your home into a personal studio, making music production more accessible than ever. To get started, we need a specific set of equipment, each piece playing a crucial role in capturing your music with clarity and depth.

The Role of High-Quality Instruments and PC Specifications
The Quality of Your Guitar: The sound of your recording is only as good as the source. A high-quality guitar will give you a clear and bold sound. Even the best recording gear can’t fix a bad-sounding guitar.
PC Specifications: Surprisingly, you don’t need a supercomputer. A PC capable of audio recording and processing is enough. This comprises a good CPU, RAM, storage for huge audio files, a specialized sound card for better audio playing, and audio interface connectors. A good rule of thumb is that if your computer can handle video games or video editing, it’s probably good for recording music too.
Essential Equipment for Recording Guitar on PC
1. Digital Audio Workstation (DAW)
The DAW is your digital canvas, where all elements of your recording come to life. It’s a powerful software platform that allows for recording, editing, mixing, and mastering tracks. With a range of free and paid versions available, finding one that suits your workflow and genre is easier than ever.
Our suggestion:
- Logic Pro – is a paid plugin with powerful options, offering up to 20 amp simulations and seven different virtual microphone options to boot. Beginner players can also greatly benefit from the included Drummer, which lets them quickly create a good-sounding rhythm group.
- Presonus Studio One– provides some world class tones straight from the box, with all of the amplifier and tone reproductions. It also features a useful microphone edit page and an extremely colorful selection of chainable stompboxes.
- IK Multimedia AmpliTube5 : This plug-in works as a stand-alone, without the need for a DAW. If you purchase iRig HD2, AmpliTube4 comes free with the purchase.
2. Audio Interface
An audio interface serves as the bridge between your guitar and computer and lets your guitar talk to your computer. It converts the guitar’s analog signals into digital format, ensuring your riffs and chords are captured with clarity and accuracy.
Our suggestion :
- Audient iD4 MkII– This arguably the best USB audio interface you can buy for less than $200 right now. Good amount of clean gain from tried and tested Audient preamp.
- SSL2+ audio interface– A compact interface with pro features and connectivity, the SSL2+ promises an affordable version of ‘the SSL sound’.
3. Cables and Connections
Ensuring you have the correct cables to connect your guitar to the audio interface. This might be a standard guitar cable or a USB cable, depending on your setup.
4. Microphone (Optional for Electric Guitar)
Even though electric guitar players can plug directly into the audio interface, using a mic can also capture the ambiance of the room, adding another layer to your sound.
- Audio-Technica ATH-M20x– perfect for tight budget want an affordable option, they offer a flat, neutral mid-range response that reproduces voices and instruments clearly and accurately.
- HiFiMan Edition XS – These use planar magnetic drivers to help them create an immersive, open, and natural-seeming soundstage well-suited for mixing and mastering.
By equipping yourself with the right tools and knowledge, you’re well on your way to capturing your musical expressions in their fullest form, ready to be shared and enjoyed by listeners everywhere.

How To Record Electric Guitar on PC?
Recording electric guitar on a PC has never been more accessible. With advancements in technology and a wide range of equipment available, everyone can transform their home into a personal studio.
Here’s a detailed guide on how to capture the essence of your electric guitar using various methods, ensuring you get the best possible sound for your projects.
1. Direct Recording with an Audio Interface
Firstly, an audio interface is essential for converting the analog signals from your guitar into digital signals your PC can work with. Initially, I was surprised by how different my guitar sounded through the interface.
Simply connect your guitar to the interface, then the interface to your computer. You can change and improve the basic sound as much as you want with plugins and amp emulators, which give you an endless number of ways to change the sound.
2. Amp to Interface Recording
For those who love the tone of their amplifier, you can connect your guitar to your amp, then use the amp’s line output to connect to your audio interface. Start with a low volume and gradually increase it to find the sweet spot without risking damage to your equipment. This method allows you to capture the amp’s unique sound directly, minimizing the need for post-recording modifications.
3. Using an Amp Simulator
Amp simulators have been a game-changer for me, providing a wide array of tones without the need for physical amps. By plugging my guitar into an amp simulator and then into the interface, I can achieve professional-sounding recordings with ease. While this method offers great sound out of the box, it does limit the ability to alter the guitar’s tone post-recording.
4. USB Interface Recording
A guitar-to-USB interface is an easy and inexpensive option for those who are strapped for cash. Although the sound quality won’t be up to par with a professional audio interface, this solution is perfect for those just starting out or who are on a tight budget. If you want to add voices or other instruments, you may need some more gear, such as a USB mixer.
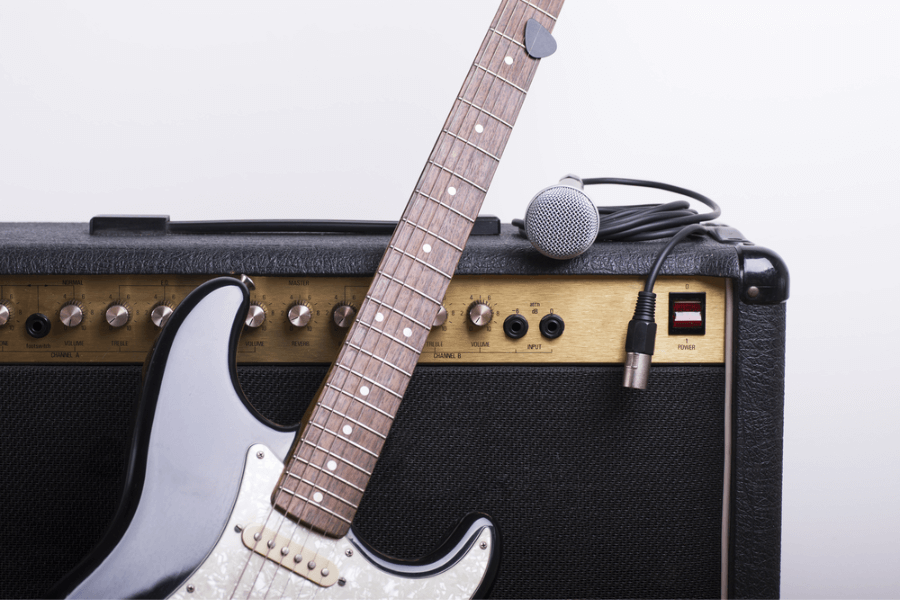
5. Microphone Recording
Capturing the sound of your amp with a microphone is a classic technique that remains popular. I’ve experimented with both dynamic and condenser mics.
Whether using a dynamic mic for its durability and ease of use or a condenser mic for a more detailed sound, microphone placement is key. Experimenting with distance and angle relative to the amp’s speaker can drastically affect the recorded tone, offering a spectrum of sonic possibilities.
6. Portable Digital Recorder
Combining a portable digital recorder with any of the above methods allows for flexibility and convenience, enabling recording without a PC. It’s especially handy for capturing ideas spontaneously or when I want to record outside my usual space. Later, you can transfer these recordings to your DAW for further editing and mixing.
Tips for Optimal Recording
- Use High-Quality Cables: This is quite necessary to use reliable cables to minimize noise and interference.
- Experiment with Mic Placement: Even small adjustments can make a significant difference. If using a microphone, try different positions to find the best sound.
- Explore Plugins and Amp Sims: Take advantage of the vast array of digital resources available to enhance and shape your guitar’s tone post-recording.
- Monitor Levels Carefully: Keep an eye on your input levels to avoid clipping while ensuring the signal is strong enough for clear recording.
3 Guitar Recording Tips And Techniques
Through trial and error and a bit of research, I’ve discovered various techniques to capture the true essence of my electric guitar.

1. Check input levels to prevent clipping.
Check and adjust input levels to prevent splitting and achieve decent recordings. The recording’s largest sections shouldn’t exceed -18 dBFS. This leaves lots of space for unexpected sound shifts.
This approach works best since it restores analog recording’s headroom, which prevents skipping after 0 dBFS. The signal-to-noise ratio must be high to prevent harsh digital cutting, even if this level may seem low on your DAW’s meters.
2. Use quality tools and wires.
Use appropriate connections and gear to reduce recording noise significantly. Bad connections let noise, hum, and distortion into your signal chain, making guitar recording difficult.
Care for your instrument and use high-quality cables to keep its sound authentic as it transitions from analog to digital via your audio interface. Most people omit this step, although it may enhance record sound and sharpness.
3. Use few effects while recording.
While recording on a PC, it’s tempting to apply effects to enhance your electric guitar sound. However, employing effects sparingly when recording provides you greater mixing flexibility.
You may experiment with amp models, pedals, and effects plugins after recording a clean signal. This helps you tweak your tone to match your mix. This approach preserves the integrity of your guitar signal and helps you be creative in the production process without committing to a sound.
Final Thoughts
Many people’s believe that setting up a basic guitar recording setup is a very complex process. After this article, Eguitarmania hopes that we can give you the easiest and comprehensive guides in recording electric guitar on PC. I hope it inspires you to make your golden performance!