Neck relief is one of those things that every guitarist should be familiar with, like adjusting a bridge or changing strings. Have you ever picked up an electric guitar with an annoying buzz with every note you play? Or perhaps you’ve found that pressing down on the strings feels like a workout in itself.
One of the vital checkups on your electric guitar is measuring the neck relief. In the Eguitarmania article, you’ll learn not just the importance of finding the perfect balance of neck curvature for your playing style, but also how to achieve it. Right from the start, understanding neck relief is your first step towards unlocking the full potential of your electric guitar.
How Much Neck Relief Electric Guitar?
The ideal neck relief for an electric guitar typically ranges from 0.008 (0.2 mm) to 0.012 (0.3 mm) inches, measured at the 8th fret while holding down the first and last frets. Only two tools are needed to check neck relief — a capo and a feeler gauge.

Factors Affecting Neck Relief
When considering the optimal amount of neck relief for my electric guitar, I’ve learned that several factors significantly influence my decision. Here’s how I navigate these considerations:
- String Gauge
- Playing Style
- Environmental Conditions
Heavier strings exert more tension on the neck, potentially requiring slightly more neck relief to prevent buzzing. I opt for lighter strings, I tend to adjust for slightly less relief since there’s less tension pulling on the neck.
My playing style also dictates the amount of neck relief I need. Stronger strumming or picking may need more relief for cleaner sound, while lighter touch players may need less. I’ve also learned that the wood in my guitar’s neck reacts to changes in temperature and humidity.
Wood is sensitive to changes in temperature and humidity, which can affect neck curvature. Living in an area with significant seasonal changes means I need to check and adjust my guitar’s neck relief periodically.
The Impact of Neck Relief on Playability and Tone
Getting the right amount of neck support is very important for making my electric guitar easier to play and sound better. Fret buzz can happen if there isn’t enough relief, especially when playing lower notes.
On the other hand, too much relief can make the guitar harder to play because you have to work harder to press the strings down. It’s crucial to find the right balance. Having a properly set neck is important for making the guitar easier to play, sound better, and be more fun to play overall.

How To Measure Neck Relief On Electric Guitar?
Before diving into the measurement process, you’ll need to gather a few essential tools:
Neck Relief Measurement Toolkit Checklist
Here are the list of tools that you need to prepare for checking guitar neck relief:
| Tool | Description | Checked |
| Capo | To fret all the strings at the first fret simultaneously. | [ ] |
| Feeler Gauges | Precision tools for measuring the gap between the string and fret. | [ ] |
| Ruler or Straightedge | To check the neck’s straightness before measurement. | [ ] |
| Tuner | Ensures the guitar is in tune, affecting string tension and neck curvature. | [ ] |
Step-by-Step: How to Measure Neck Relief on Electric Guitar
Begin by ensuring your guitar is perfectly in tune. The tension of the strings needs to be consistent with how you usually play. Use the capo on the first fret of your guitar.
Then, the standard practice is to measure neck relief at the 7th or 8th fret, as this is typically the midpoint between the capo at the first fret and where the neck joins the body (usually around the 17th fret). While the capo is still on, press down on the low E string (the thickest string). With the string pressed down, use a feeler gauge to measure the gap between the bottom of the string and the top
Eguitarmania’s Tip: When using feeler gauges for measuring neck comfort, press and apply the strings consistently. Small pressure changes may affect readings.

How to Adjust Your Electric Guitar Neck?
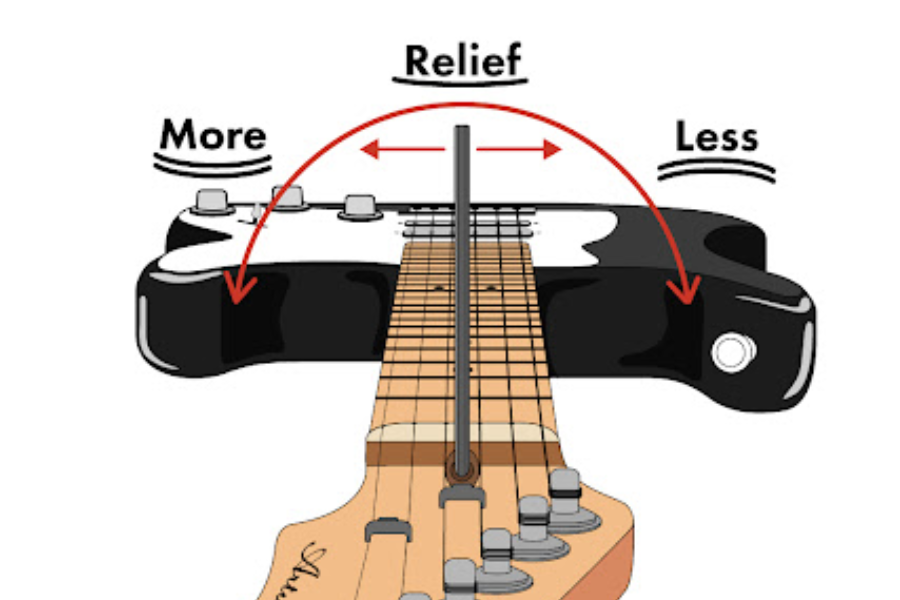
Adjusting the neck relief is typically done by altering the tension of the truss rod, a metal rod that runs inside the neck of the guitar.
To keep the neck at the correct curve (relief), the truss rod serves as a counterweight to the string tension. Tightening the truss rod reduces the relief (makes the neck straighter), while loosening it increases the relief (makes the neck more bowed).
After measuring neck relief, following these steps and tips, you can adjust your guitar neck in 5 minutes:
Determine the Direction of Adjustment
The neck is too straight or maybe even back-bowed if the gap is smaller than the desired relief. This means the truss rod needs to be relaxed. If the gap is bigger, on the other hand, the neck has too much relief, and the truss rod needs to be adjusted.
Make the Adjustment
Turn the truss rod adjustment with the right wrench or Allen key. Remember that turning the truss rod “righty-tighty” (clockwise) makes it tighter, which lowers the relief, and turning it “lefty-loosey” (anticlockwise) makes it looser, which raises the relief.
Small changes should be made, one quarter turn at a time. Then, tune your guitar again and check the comfort again. Do it again and again until you get the relief you want.
Check String Action and Intonation
After adjusting the neck relief, always remember to check the action and intonation of your guitar. Adjusting the neck can affect both, so you may need to make further adjustments to the bridge or nut.
Eguitarmania’s Tip: Avoid over-adjusting. Small increments can have a significant impact on neck relief.
How Much Guitar Neck Relief is Too Much?
There is such a thing as too much neck relief, which can lead to various playability issues and discomfort.
Signs of Excessive Neck Relief
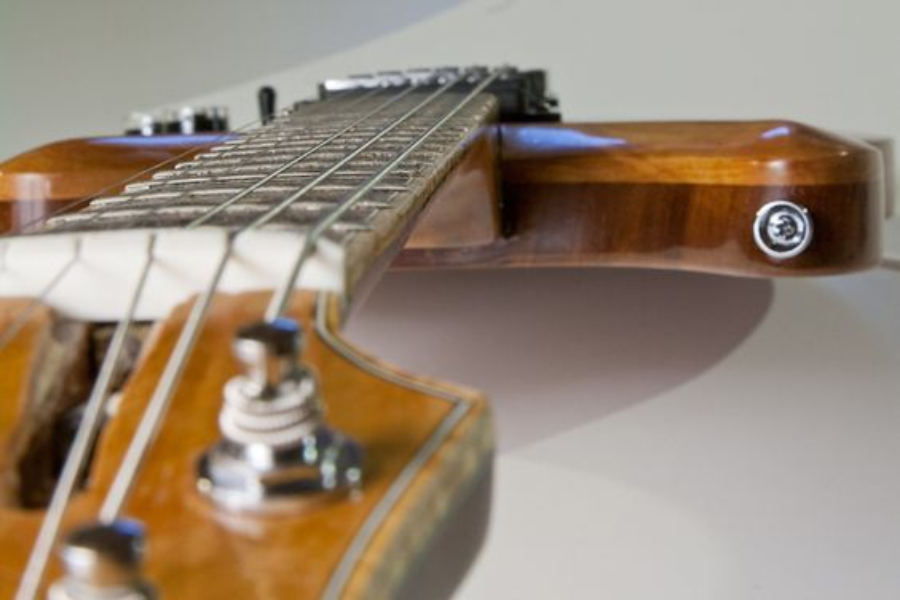
Neck relief” is the tiny bend or bow in an electric guitar’s neck that prevents fret buzz and improves playability. This curve leaves a little gap between strings and frets. This allows easy guitar playing across all frets without strings hitting them.
Sometimes a feeler gauge is used at the 8th fret to measure neck relief when the string is pushed down at the 1st fret and where the neck touches the body, generally around the 17th or 19th fret on most guitars.
Excessive neck relief can manifest in several ways, all of which detract from the guitar’s playability:
- High Action
- Muddy Tone
- Intonation Issues
- Uneven Playability
Relief exceeding 0.020 inches (0.5 mm) is generally considered too much for most playing styles and can lead to the issues mentioned above.

Finding The Balance
At Eguitarmania, we do not have a one-size-fits-all setting. The recommended neck relief for most electric guitars falls within the range of 0.008 inches (0.2 mm) to 0.012 inches (0.3 mm). The ideal amount of neck relief can vary based on playing style, string gauge, and personal preference.
For instance, players with a heavy picking hand or those who use thicker gauge strings may benefit from slightly more relief to prevent fret buzz, while players with a lighter touch or using thinner strings might prefer less relief for a lower action and faster playability.
Our Conclusion
Figuring out and setting the right amount of neck relief is a significant component of setting up an electric guitar that can make it sound and feel better. Regularly checking and adjusting the neck relief as part of your guitar maintenance routine can prevent playability issues and ensure your instrument performs at its best.


